In this lesson, we will install the most important framework in the smart car and make car to do some simple movements as per our python sample code. If you have passed the test movement of this lesson, that means Arduino, voltage meter,motor drive module(Model-PI), motors, batteries,chassis and wire connections between these parts are all functioning well. As your experiments in future lessons are all based on frame work of Lesson One, it is very important to test the installation and sample code in this Lesson properly.
Hardware Installation
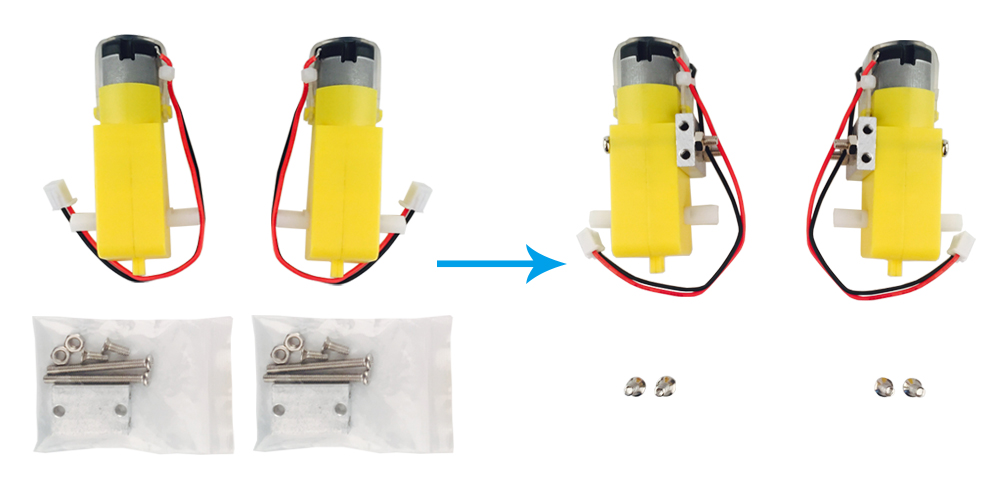
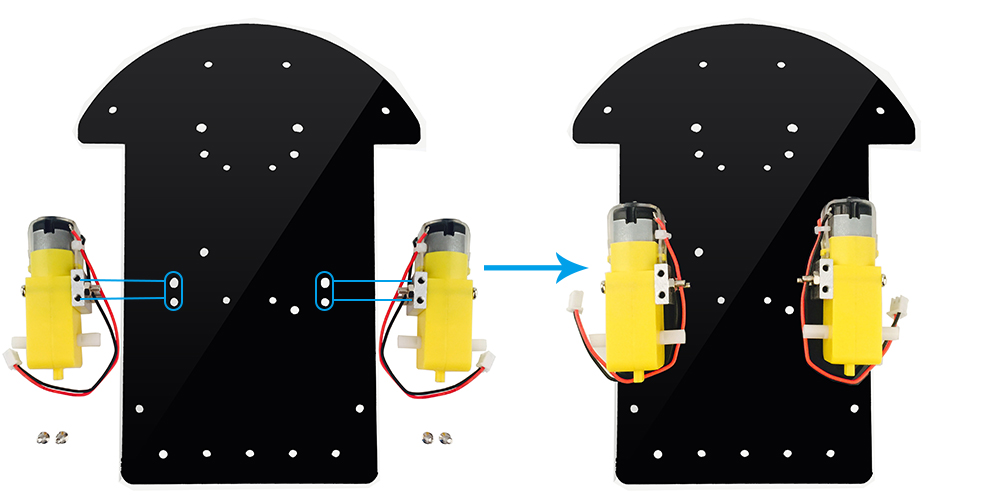
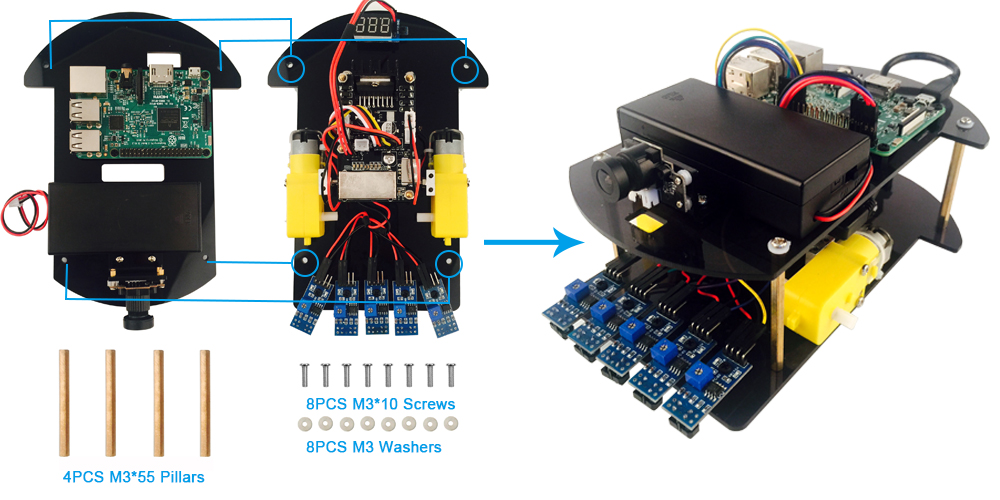
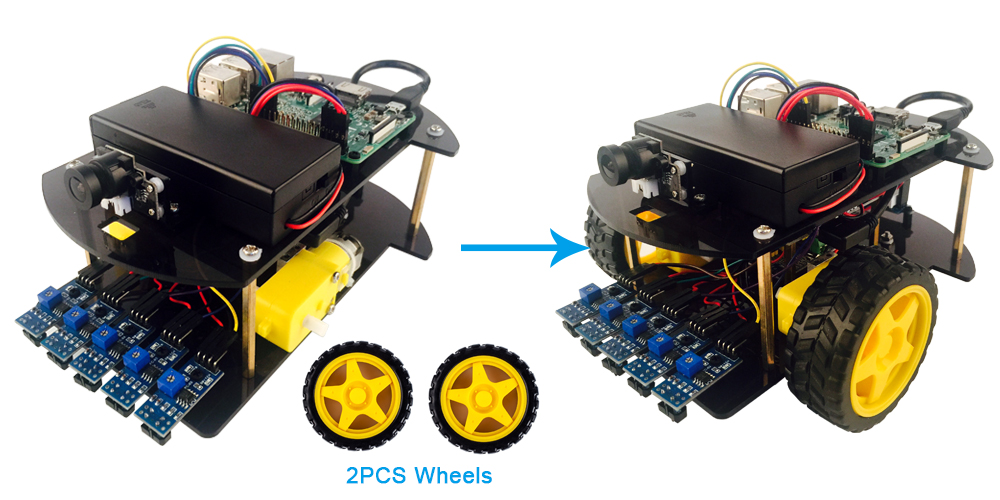
STEP1. Install driving wheels as follows.
STEP2. Install universal wheel as follows.
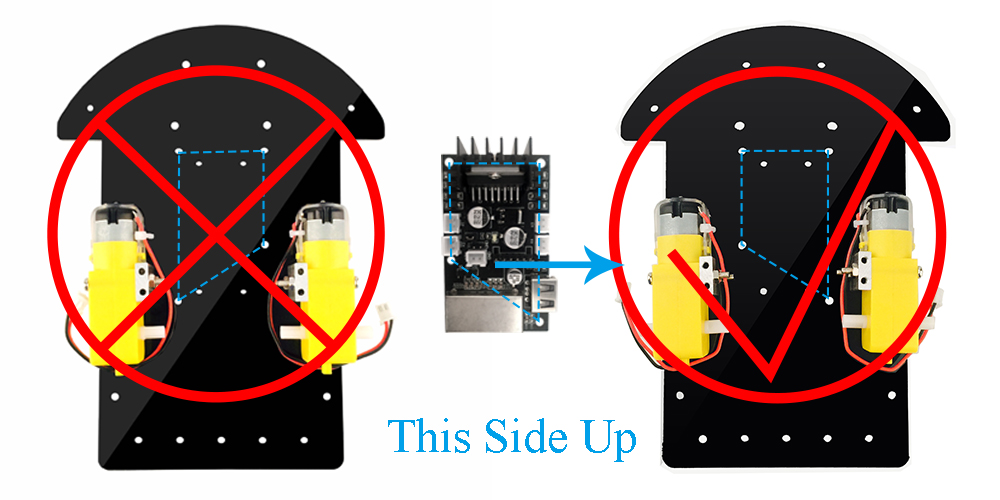
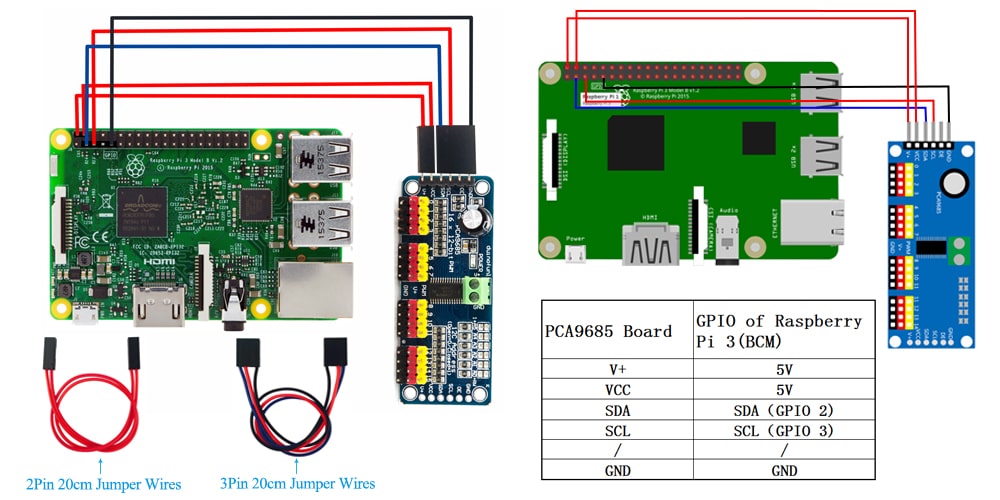
STEP3. Install PCA9685 compatible module.
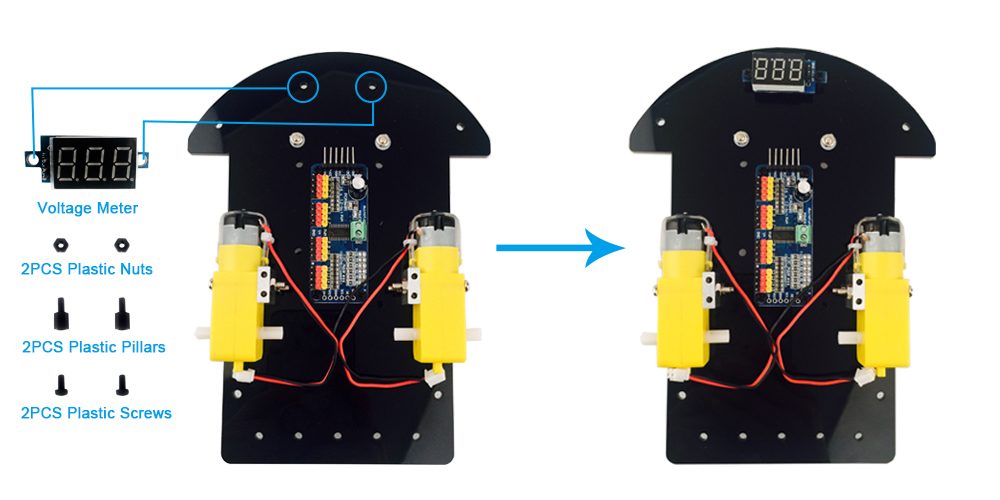
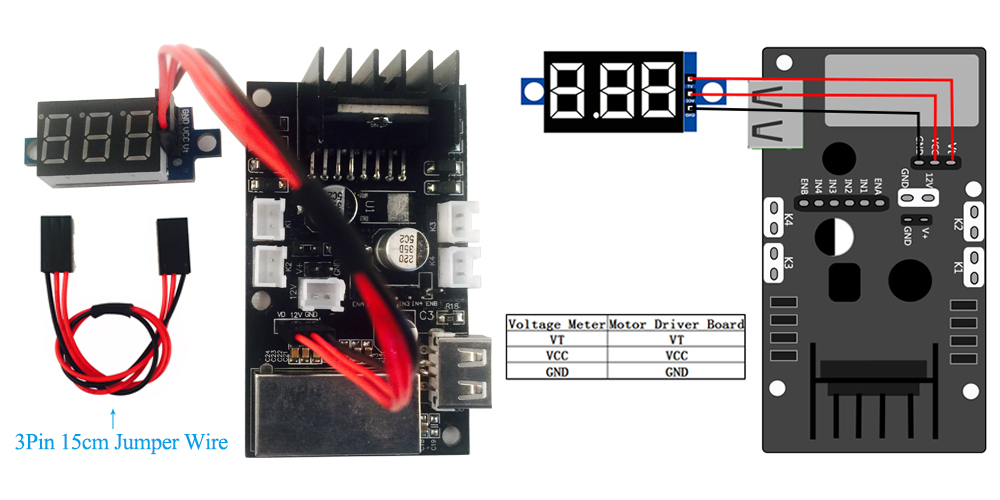
STEP4. Install voltage meter as follows.
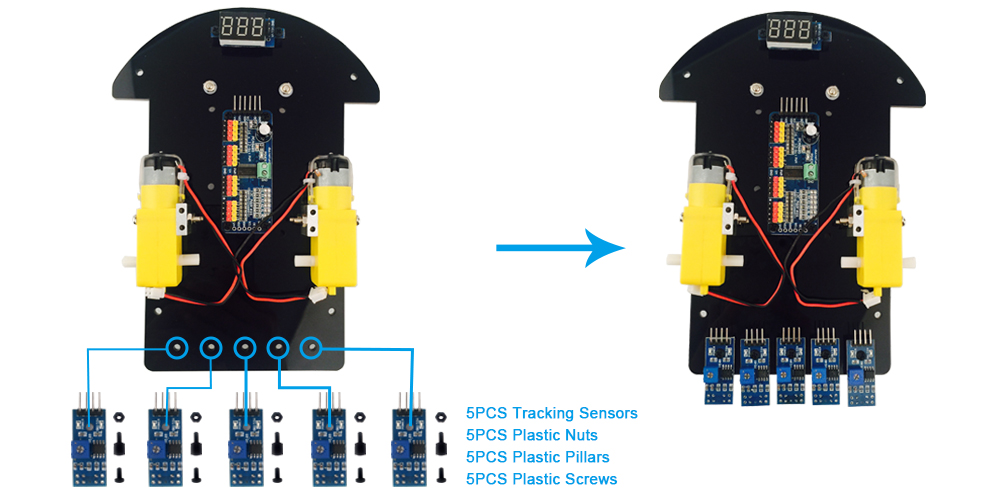
STEP5. Install 5 pcs tracking sensor as follows.
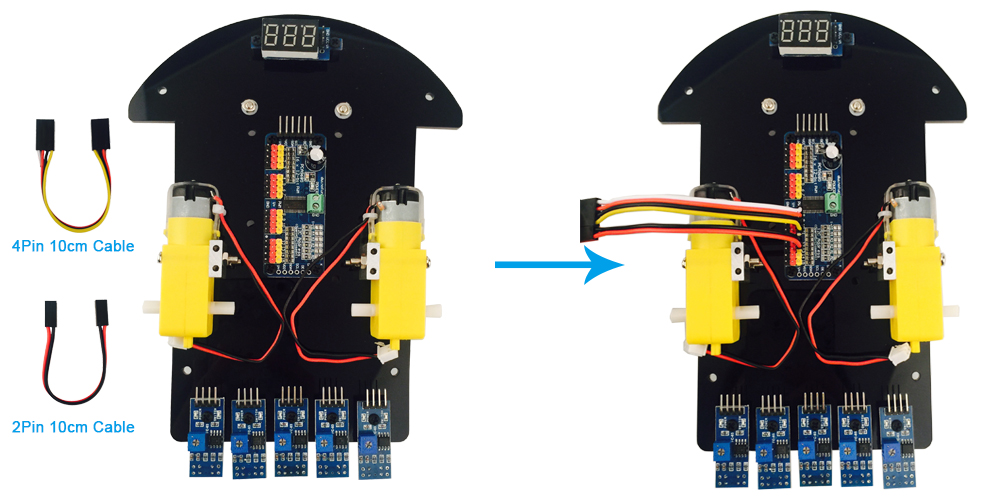
STEP6.Plug the 4 pin female to female cable (white,red,black,yellow) and 2 pin female to female cable(black,red) into PCA9685 compatible board as follows.
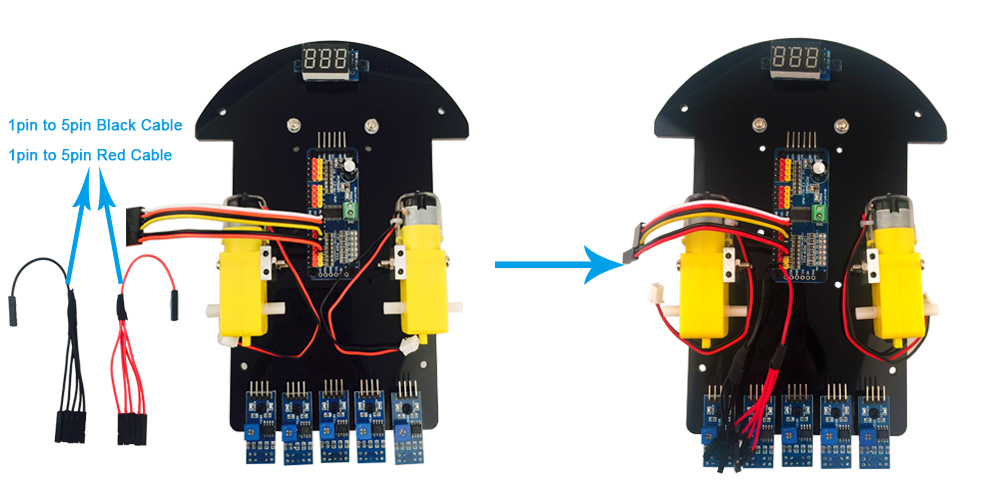
STEP7.Plug the 2 PCS 1 pin to 5 pin female to female cable (Black and Red) into PCA9685 compatible board as follows.
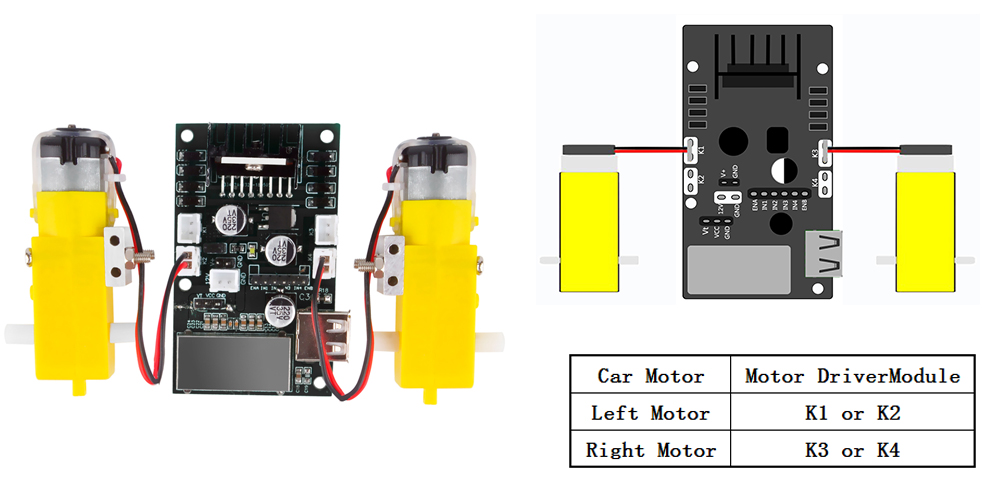
STEP8.Install the model pi motor driver board as follows. Then connect PCA9685 compatible module to motor driver board via 4pin and 2 pin cable.Meanwhile, connect the voltage meter to motor driver board via 3pin cable.
STEP9.Install camera module on the top car chassis as follows.
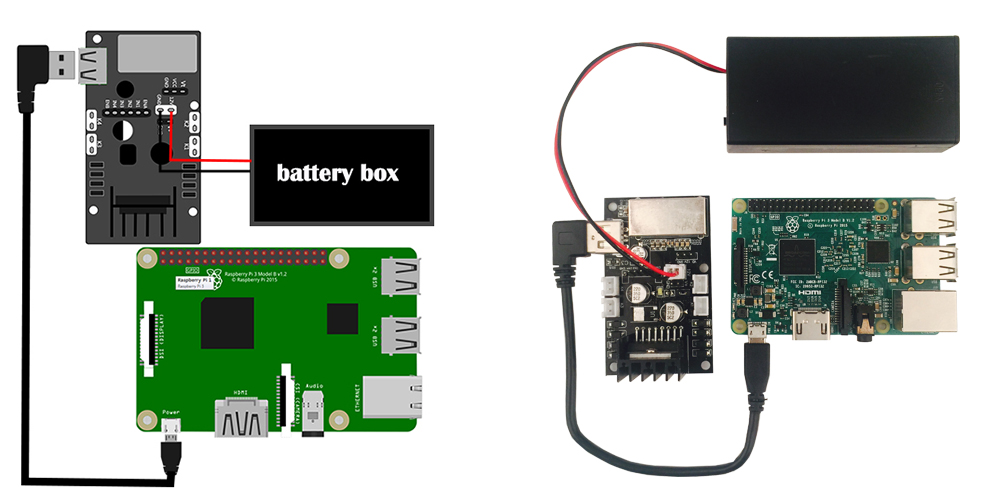
STEP10.Install battery box on the top car chassis as follows.
STEP11.Install raspberry pi on the top car chassis as follows.
STEP12.Before intall the top chassis as follows, you need to plug the battery box into model pi motor driver, then connect the Raspberry Pi board to PCA9685 compatible module and model Pi motor driver board, Lastly, connect 5 pcs tracking sensors to raspberry pi as follows.
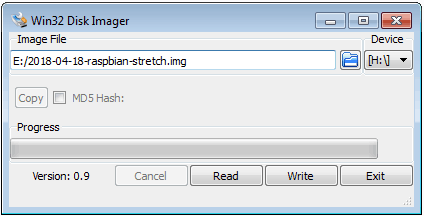
Step 0:Before connect to Raspberry Pi, you need to install Raspbian Operation System(OS) onto SD card(skip this step if your SD card has pre-installed Osoyoo Robot Image).You can select the latest version of RASPBIAN system on the official website: https://downloads.raspberrypi.org/raspbian/images/. Write the image via Win32DiskImager utility into your microSD/TF card(minimum 16G), then plug the card into the slot on your Raspberry Pi.Step 1: Connect Wifi
Firstly, Connect Raspberry Pi to your HDMI monitor or TV. Put a keyboard and mouse into Raspberry Pi USB ports. Insert SD card into the slot on your Raspberry Pi.Click on the wireless icon top right on desktop, should give a list of access points, select your wifi ssid and connect it. Once your Pi is connect to Wifi, you can hover your mouse to the wifi icon to see the your IP address.
Or your can type sudo ifconfig wlan0 command in terminal. Your local ip address will show in wlan0 block(right side of the word inet addr:). It will look like 192.168……
Please remember above IP address, it will be used in our next steps.
Important Note:As the raspberry pi robot car image was written into SD Card, you just need to follow the step 1 to connect wifi and skip Step 2 to Step 5, directly run the Testing Python code.
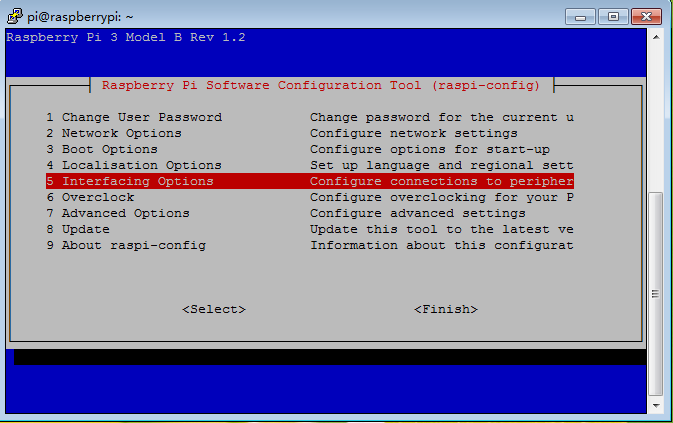
Step 2: Open SSH connection
SSH enable user to type shell command remotely from internet so that we can control the car through wifi.In order to enable SSH function, we need type following command from terminal:
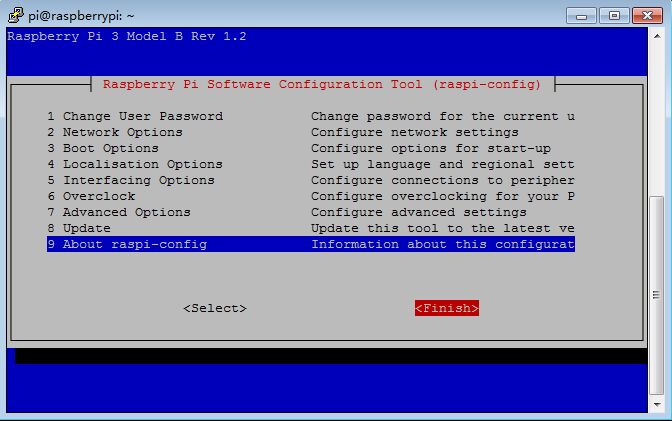
sudo raspi-config
Then select Interfacing Options->SSH->Yes->Ok->Finish
Step 3:Use SSH to connect Raspberry Pi terminal remotely
In order to make the car moving freely, we need disconnect Raspberry Pi from monitor, keyboard/mouse and use SSH to send command to Raspberry Pi terminal remotely.
If you are using Windows to send ssh command. you need download a free software called PuTTy to connect the Raspberry Pi local IP(you got from STEP 1).
If you are using MacBook or other linux computer, please type: ssh [email protected]
ssh your_raspberry_pi_local_ip_address
*your_raspberry_pi_local_ip_address means the wifi IP address you got from STEP 1
When connecting ssh, you need use default user name piand default password raspberryto login to Raspberry Pi.
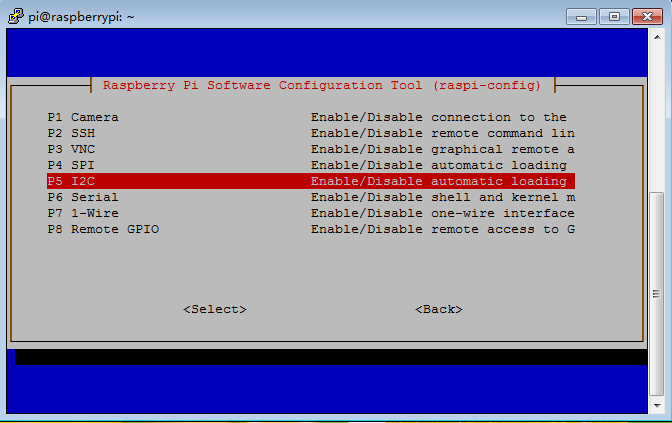
Step 4: Open I2C function(skip this step if your SD card has pre-installed Osoyoo Robot Image)
I2C is a protocol which will be used to exchange data with I2C device. In our project, I2C device is PCA9685 module.In order to use I2C function, we need type following command from terminal:
sudo raspi-config
Then select Interfacing Options->I2C->Yes->Ok->Finish
Step 5: Install GPIO Library(skip this step if your SD card has pre-installed Osoyoo Robot Image)
cd ~
sudo pip install adafruit-pca9685
Testing Previous Installation(skip this step if your SD card has pre-installed Osoyoo Robot Image)
Download testing python code by typing following commands:
cd ~
mkdir osoyoo-robot/
cd osoyoo-robot/
wget http://osoyoo.com/driver/motor-test.tar.gz
tar -zxvf motor-test.tar.gz
Testing
Step 6: Run Testing Python code
cd ~/osoyoo-robot/motor-test
python motor-test.py
Important Note:As the raspberry pi robot car image was written into SD Card, you just need to follow the step 1 to connect wifi and skip others steps, directly run the Testing Python code.
After running above python sample code, your car should move forward for 2 seconds, then move backward for 2 seconds , then turn left for 2 seconds and finally turn right for 2 seconds.
If your car does not move as per above scenario, the installation should have some problem. You need double check the wire connection and software installation as per our previous steps.